
💡Please note that the AMS360 Agency Administrator must complete the following steps.
This video provides a quick walkthrough on navigating to WSAPI and EMS.
Step 1
As the AMS360 Agency Administrator, login to AMS360 (https://www.ams360.com).
You can only access AMS360 from a Microsoft Windows 10 or later computer. If you still need to, please download the desktop client during your initial login to AMS360. You can access AMS360 from the following browsers (all other operating systems or browsers are not supported):
- Internet Explorer (IE) 11
- Microsoft Edge
- Google Chrome
Step 2
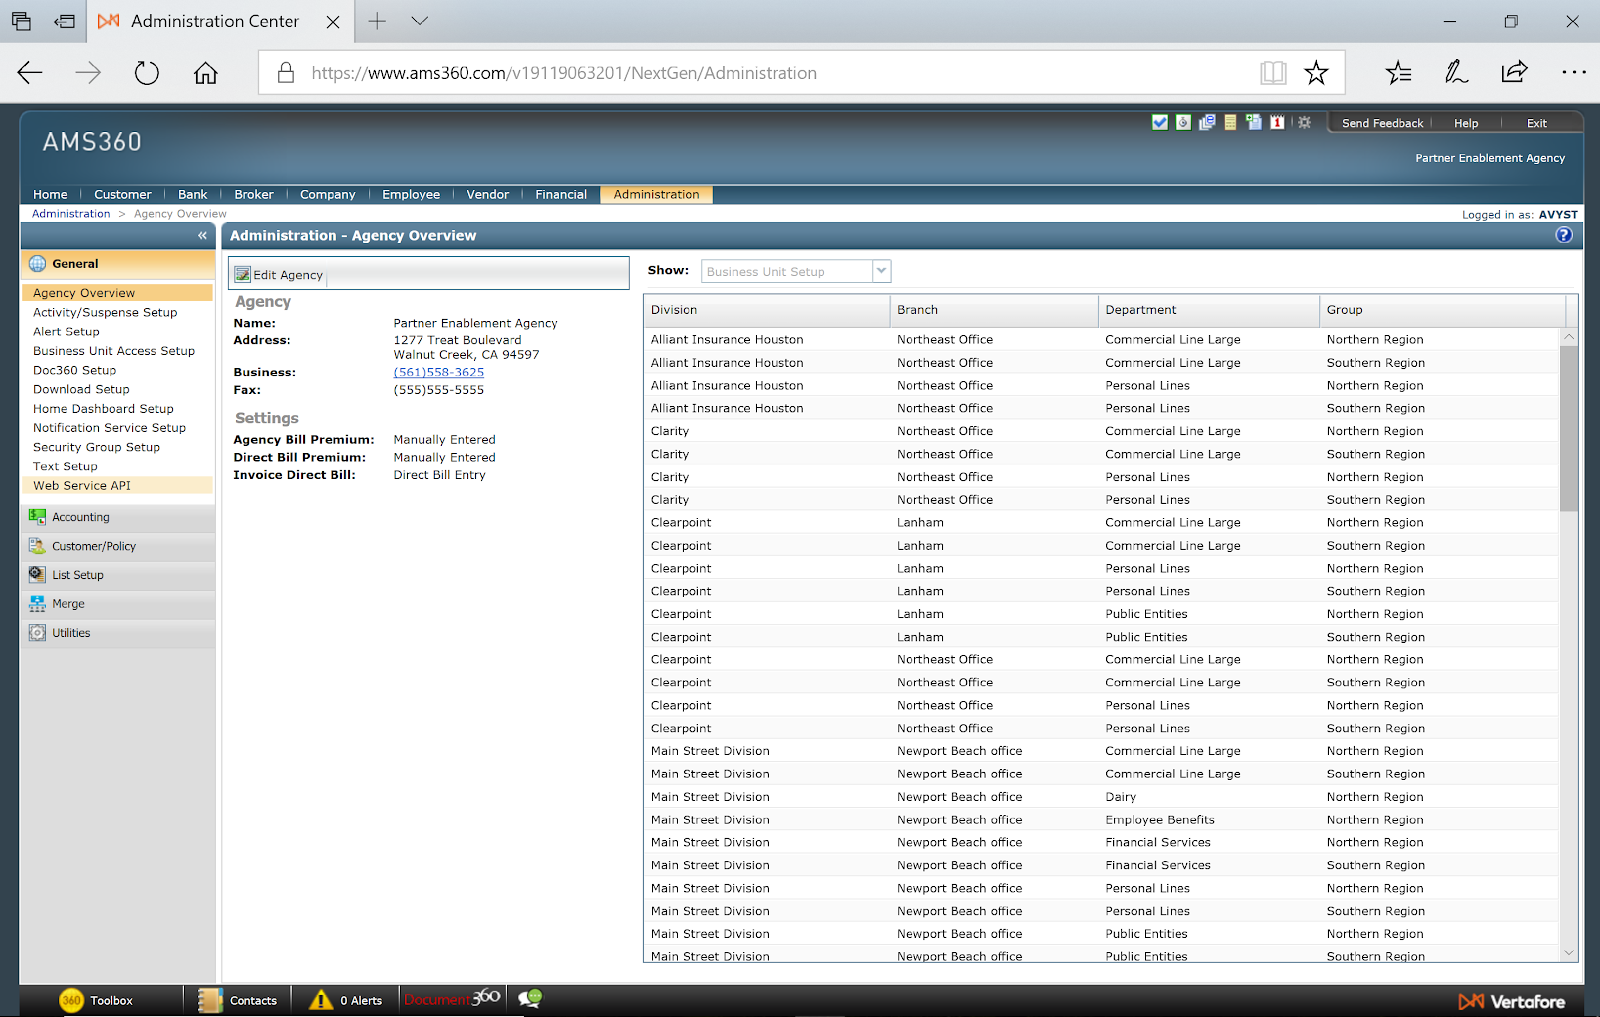
Once successfully logged in, on the top navigation bar, select Administration.
Provide Agency Number
Please provide your AMS360 Agency Number to your onboarding specialist. If you need help locating it, check out this article from Vertafore on managing your agency.
Configure EMS Agency Key
In Administration, navigate to the left side General ➡️ Application Catalog.
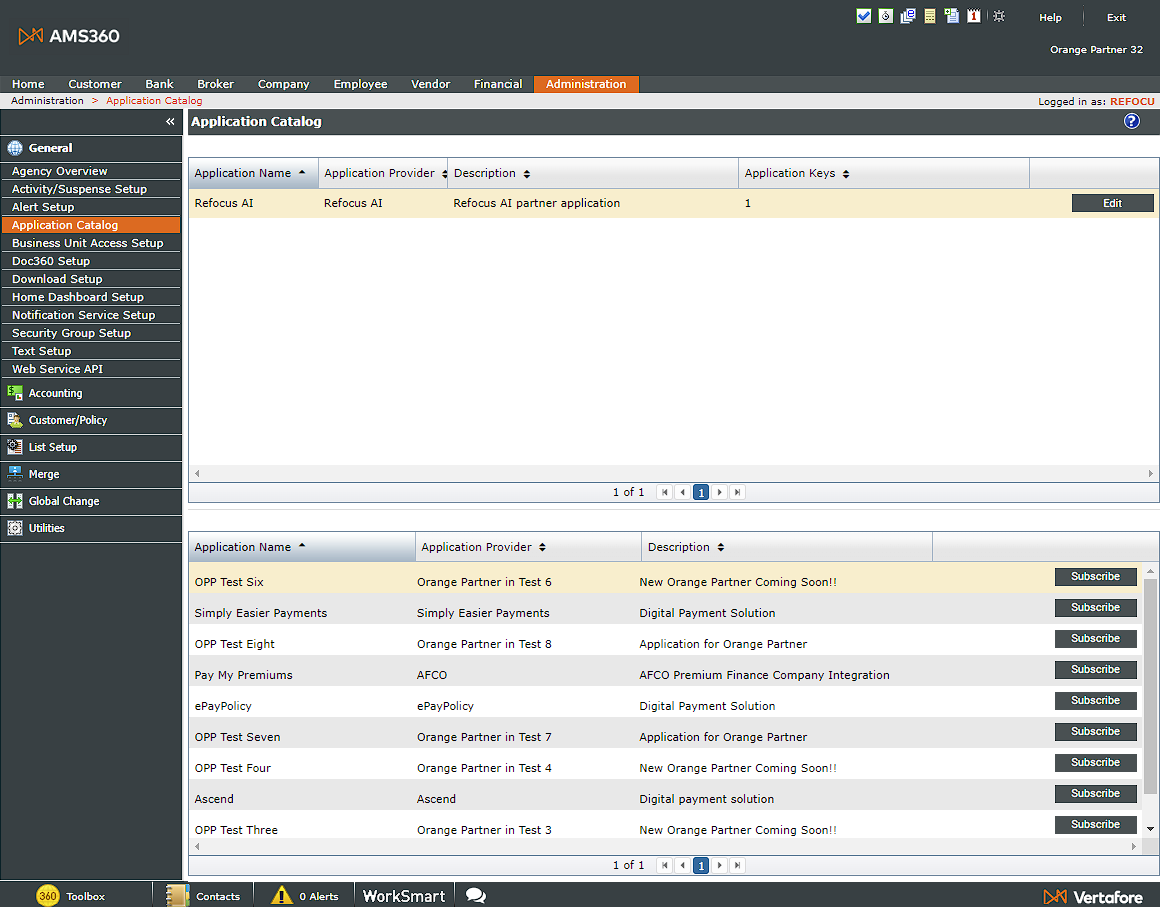
When you initially load the Application Catalog, the top window will not show the ReFocus AI integration. You must search for it in the bottom window and select Subscribe.
Once you have subscribed, click the Edit button next to the ReFocus AI integration.
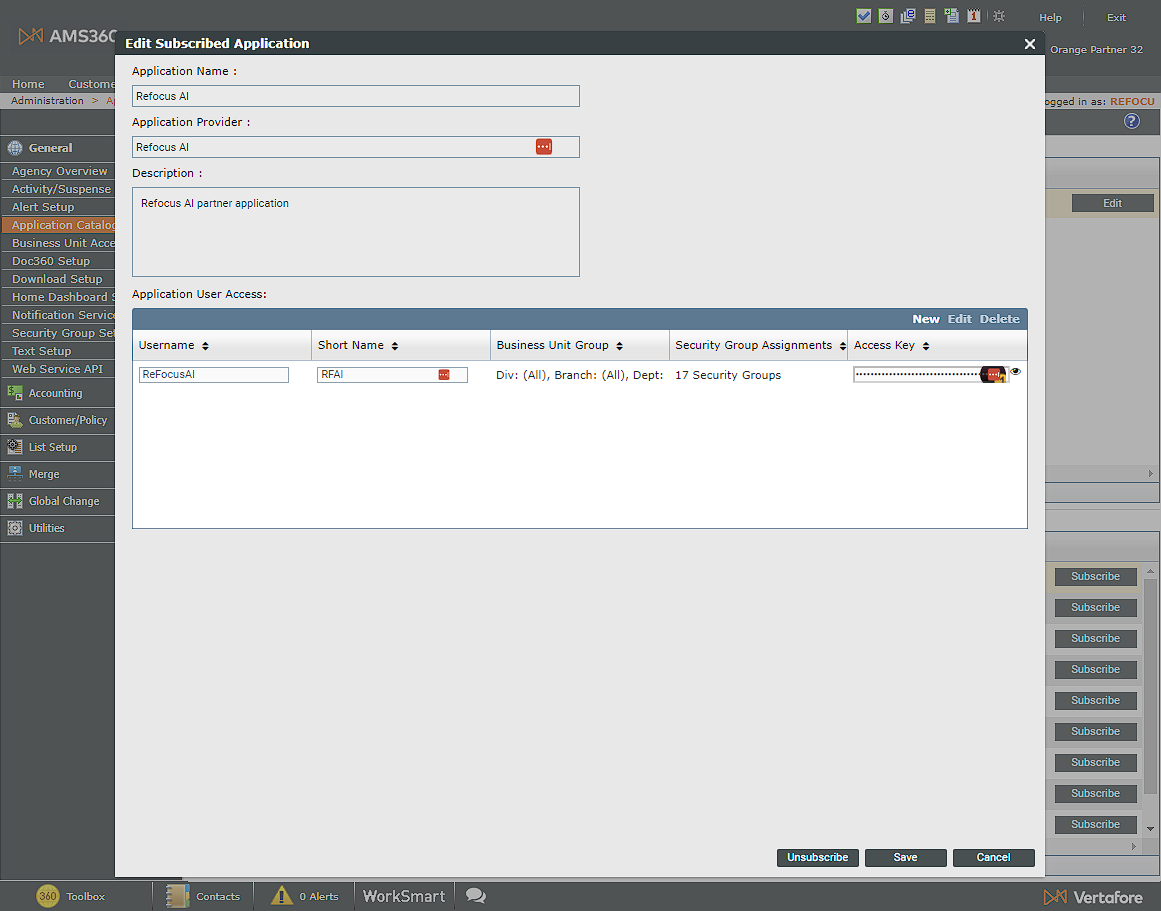
You can now provision access for the ReFocus AI integration.
Select New in the Application User Access screen. For credentials, we recommend using:
- Username: ReFocusAI
- Short Name: RFAI
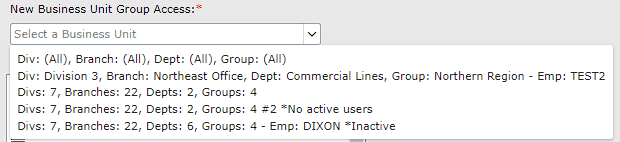
- Business Unit Group ➡️Select a Business Unit Drop Down: Select the first option for All.
- Security Group Assignments: Select All
Select Add in the Application User Access screen to save.
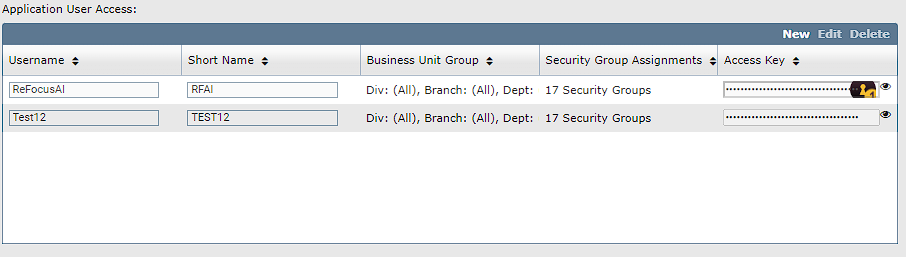
Once you have saved, select the 👁️to view and copy the Access Key. Please provide this to your onboarding specialist.
Configure Web Services API Account
In Administration, navigate to the left side General ➡️ Web Service API.
When the following screen loads, select Add to create a connection to the new web service.
For credentials, please use the following:
- WSAPI Login ID: REFOCUSAI_[Your company name]
- Password: Create a secure password and provide it to your onboarding specialist
💡If you need to use an abbreviation for your company so that your Login ID is within character limits, please provide it to your onboarding specialist. An example is shortening TheBestBrokerage to REFOCUSAI_TBB.
Select the box under data security for Entity Access Security Only.
Under Entity Access, select Check All.

Once you have configured the system, select the Save icon to complete the WSAPI setup.

Create Custom Action for Activities
ReFocus AI uses Custom Actions as an activity code so reports can be run within AMS360 on the suspenses the integration creates.
In Administration, navigate to the left side General ➡️ Activity/Suspense Setup.
💡 To access Profile Questions, the AMS360 application must be installed on your computer.
In the window that opens, select New from the Actions section.

Ensure Active is selected. In the Action field, type in zzzReFocusAI. Leave Checkpoints as is.
Select the Save 💾 icon. You can now close the window.
⚠️ If Save 💾 is not selected before closing the window, the new questions will be lost, and you will need to start over.
Create Profile Questions
Custom profile questions enable administrators to run reports with additional information on created suspenses.
In Administration, navigate to the left side General ➡️ Customer/Policy➡️Profile Questions.
💡 To access Profile Questions, the AMS360 application must be installed on your computer.
In the window that opens, select New from the Profile Questions section.
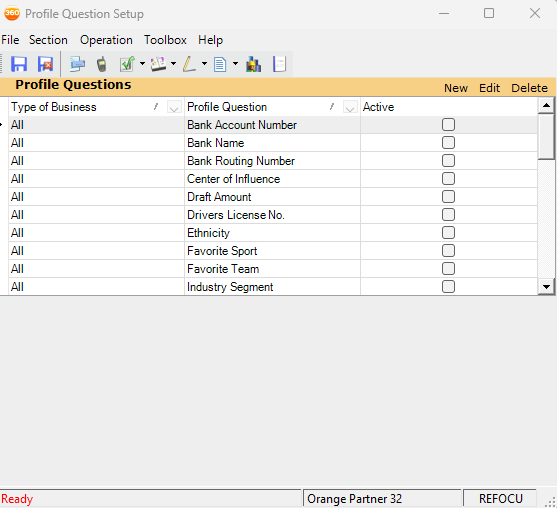
Ensure the Type of Business is set to All and the Active is selected.
Create the following profile questions. Put the name in Text and set Answer to the corresponding drop-down option.
After adding each question, select Add.
- Cancellation Risk: Yes/No
- Confidence_Quality: Text ▶️ Very High, High, Medium, Low
- Confidence_Quantity: Number
- Cancel_reason_expct: Text
- Date of prediction: Date
Once all the questions have been added, select the Save 💾 icon. You can now close the window.
🔔Please make sure to double-check that the right data type has been selected for each custom profile question. Once saved, custom profile questions can not be changed or deleted.
⚠️ If Save 💾 is not selected before closing the window, the new questions will be lost, and you will need to start over.
Step 3
With the system configured, it is now time to complete the initial export of data from AMS360 so that ReFocus AI can build machine learning models to predict which clients are likely to leave.
From the Toolbox on the bottom left of the screen, select Classic Reports.
 |
 |
From the Reports - All windows that loads, please run the following reports.
| Report Name | Report Settings |
| Customer List |
Settings = All |
| Cancellation |
Select Dates = As far back as possible to current All other fields = All |
| Expiration Renewal report |
Select Dates = As far back as possible to current All other fields = All |
| Notes |
Select Dates = As far back as possible to current All other fields = All |
| Policy book of business |
Select Dates = Current Date All other fields = All Show Policy totals for Not Renewed/Not Cancelled = True |
| Transaction Report |
Select Dates = As far back as possible to current All other fields = All |
Once these reports have been run, please provide them to the onboarding specialist in the Google Drive folder that has been shared.
You have successfully configured AMS360 to work with ReFocus AI 🎉
-png.png)